آموزش چگونگی طراحی و ساخت sound effect برای فیلم
اکتبر 15, 2019
3779
بدون دیدگاه


You must need to login..!
راه اندازی
اولین کاری که من هنگام ورود به سالن اجتماعات انجام دادم ، جایی که قسمتهای مختلف بازیگران و بازیگران در حال شروع به جمع آوری بودند ، دو پایه میکروفون برپا شده بود که هرکدام یک میکروفن مداد مخصوص Groove Tubes GT44 با ارتفاع فشرده نگه داشتند تا بتوانم شروع به گرفتن سر و صدای جمعیتی که در اتاق جمع می شوند. با توجه به اینکه سالن یک کف چوبی داشت که با حرکت مردم بر روی آن حرکت می کرد ، بسیار مهم بود که میکروفن من شوک های مخصوص به خود را داشته باشد. من میکروفون ها را با الگوی کاردیوئید انتخاب کردم تا آنها برخی از جهت ها را داشته باشند و در صورت استفاده از آن به عنوان یک جفت استریو ، به فضایی که در آن وسایل اضافی و بازیگران در آن حرکت می کردند ، حس دهند. در حالت ایده آل ، من میکروفون را از اکشن در هر صحنه قرار می دادم ، اما قرار گرفتن نور در آن بسیار مهم بود و تقدم داشت.
در طول فیلمبرداری ، دیوارهای سالن “نورهای برجسته را می وزیدند” (نور منعکس شده از دیوارها از دامنه دینامیکی دوربین فراتر رفته بود) ، بنابراین زمان زیادی صرف تنظیم صفحه ها و حرکت چراغ ها می شد و من مجبور بودم کار کنم در مورد فعالیت های تکنسین روشنایی و همچنین فعالیت های DOP.
یک مشکل غیرمنتظره توسط زنبور عسل ایجاد شده بود که از خواب زمستانی در قایق ها از خواب بیدار شده بود و به نظر می رسید مجذوب چراغ های گرم! متأسفانه ، این بدان معناست که مدت زمان طولانی را صرف وزوز درست بالای میکروفن های من کرد ، که آنها آنها را به وضوح برداشتند. اگرچه ما سعی نکردیم زنبور عسل را از بین ببریم ، صحنه ای که آن را تحت تأثیر قرار می داد ، فقط به جای گفتگوی «لب-همگام» درگیر هابوب عمومی بود ، بنابراین به اندازه کافی صدای مختلفی وجود دارد که از طریق متن های مختلف برای کار در اطراف صدای بلند صحبت می کند!
برای بقیه روز ، ما بین صحنه هایی که نیاز به صدای اتاق استریو و آنهایی که درگیر گفتگو هستند ، متناوب بودیم ، بنابراین بسیاری از مبادلات بین GT44 و میکروفون رونق mono boom باید انجام شود. خوشبختانه برای من ، اگرچه مشغول فیلمبرداری در جایی بودیم که ظاهر بسیار مهم بود ، بنابراین تنظیم چراغ و موقعیت دوربین نسبت به تجهیزات صوتی بیشتر طول کشید ، این بدان معنی بود که همیشه زمان کافی برای تعویض اتصالات و تنظیم مجدد DR40 وجود داشت. میکروفونهای استریو من از منبع تغذیه فانتوم کمی ، بی سیم و بی سیم خود را داشتند ، بنابراین مجبور شدم که DR40 را به استریو تنظیم کنم و هر زمان که از گفتگو به ضبط صدا در محیط تغییر می کردم ، قدرت فانتوم آن را خاموش می کردم. جدا از یک تنظیم منوی آزار دهنده که به حالت پیش فرض پیش فرض نشده است و هر بار تعویض مجدد مجبور به استفاده مجدد از آن شدم ، انجام این کار بسیار ساده بود ، و همچنین در حالی که دوربین و چراغ ها مرتب می شدند ، زمان انجام ضبط های تست را نیز داشتم. .
گزینه دیگری که در دسترس من است استفاده از DR40 برای گفتگو و Zoom H4N برای ضبط محیط و یا برعکس است ، اما وقتی شما در موقعیتی پرحرارت و با حواس پرتی زیاد کار می کنید ، داشتن متغیرهای کمتری برای مقابله با این معنی است که وجود دارد. شانس کمتر برای اشتباه کردن وجود دارد ، بنابراین من با یک دستگاه گیر افتادم. در این یادداشت ، من می فهمم که هر چه زنگ و سوت کمتری محصولی را طی کند بهتر است. اندازه گیری پاک هنگام تنظیم سطوح ایمن در یک عجله ، و یا در روشنایی ضعیف ، بسیار حیاتی است و بیشترین استفاده از دکمه ها مانند کنترل های حمل و نقل ، نباید به طرز تصادفی مرتباً آسان باشد.
قبل از فیلمبرداری ، من استفاده از یک دستگاه ضبط قابل حمل با ورودی های XLR بیشتر ، مانند Tascam’s DR680 را در نظر گرفتم تا بتوانم همزمان محیط و گفتگو را ضبط کنم ، اما به صورت گذشته نگر ، انجام این کار با بسیاری از افراد گله مند غیرفعال می شد. و در نهایت غیر ضروری ثابت شد
Setting Up
The first thing I did on arrival at the venue, where various extras and actors were beginning to gather, was set up two microphone stands, each holding a phantom-powered Groove Tubes GT44 pencil mic at head height, so that I could begin capturing the noise of crowds gathering in the room. Given that the hall had a wooden floor that moved as people walked on it, it was vital that my mics had their own shockmounts. I chose mics with cardioid patterns so that they would have some directionality and, when used as a stereo pair, would give a sense of space in which the extras and actors were moving. Ideally, I’d have placed the mics equidistant from the action in each scene, but the positioning of the lighting was more critical and took precedence.
Throughout the filming the walls of the hall were ‘blowing the highlights’ (the light reflecting from the walls was exceeding the dynamic range of the camera), so a lot of time was spent setting up screens and moving lights, and I had to work around the Lighting Technician’s activities, as well as that of the DOP.
One unexpected problem was caused by a bee, which had woken from hibernation in the rafters and seemed fascinated by the warm lights! Unfortunately, this meant that it spent a long time buzzing right above my microphones, which they picked up very clearly. Although we tried and failed to remove the bee, the scene it was affecting only involved general hubbub rather than ‘lip-sync’ dialogue, so there was enough audio from the various takes to work around the loud buzzes!
For the rest of the day we alternated between scenes requiring stereo room sound and those involving dialogue, so a lot of swapping back and forth between the GT44s and the mono boom mic had to be done. Fortunately for me, though, we were filming something where the look was very important, so it took longer to set up lights and camera positions than the sound equipment, which meant there was always ample time for me to switch connections and reset the DR40. My stereo mics had their own, slightly unwieldy, phantom power supplies so I had to set the DR40 to stereo and turn its phantom power off whenever I switched from dialogue to ambient sound recording. Apart from one annoying menu setting that defaulted to a preset state and had to be re-applied each time I swapped over, it was very simple to do, and I also had time to make test recordings while the camera and lights were being sorted out.
Another option available to me would have been to use the DR40 for dialogue and the Zoom H4N for ambient recording, or vice versa, but when you are working in a hectic situation with lots of distractions, having fewer variables to deal with means that there is less chance of making a mistake, so I stuck with the one device. On that note, I find that the fewer bells and whistles a product has to get in the way, the better. Clear metering is vital when setting safe levels in a rush, or in poor lighting, and the most frequently used buttons, such as the transport controls, should not be fiddly or easy to nudge by accident.
Before filming I did consider using a portable recorder with more XLR inputs, such as Tascam’s DR680, so that I could record the ambience and dialogue at the same time, but in retrospect, doing that would have been impractical with so many people milling around, and ultimately proved unnecessary.
آموزش ایجاد افکت نوارهای VHS رو ویدیو در Premiere برای دانلود آموزش ایجاد افکت نوارهای VHS رو ویدیو در Premiere با کیفیت full hd 1080p از پلیر سایت یا لینک زیر
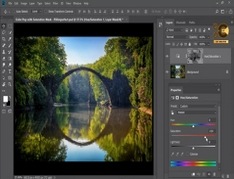
طریقه کار کردن با Mask و Saturation در photoshop(فتوشاپ) برای دانلود آموزش طریقه کار کردن با Mask و Saturation در photoshop(فتوشاپ) با کیفیت full hd 1080p از لینک زیر یا پلیر س
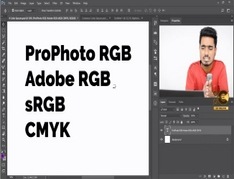
توضیحاتی درباره سیستم رنگی RGB , sRGB , CMYK و… برای دانلود آموزش توضیحاتی درباره سیستم رنگی RGB , sRGB , CMYK و… با کیفیت full hd 1080p از لینک زیر یا پلیر سایت اس�
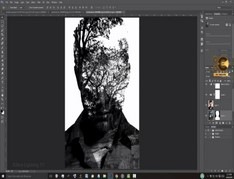
آموزش خلق پوستر حرفه ای از پرتره در photoshop برای دانلود رایگان آموزش خلق پوستر حرفه ای از پرتره در photoshop با کیفیت full hd 1080p از پلیر سایت یا لینک زیر ا�
از تنظیمات پیشرفته فتوشاپ در Lightroom استفاده کنید برای دانلود آموزش از تنظیمات پیشرفته فتوشاپ در Lightroom استفاده کنید! با کیفیت full hd 1080p از لینک زیر �
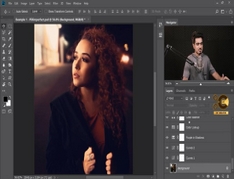
بهترین راه برای اصلاح و fix کردن رنگ عکس در photoshop(فتوشاپ) برای دانلود آموزش اصلاح و زنده کردن رنگ های عکس در photoshop(فتوشاپ) با کیفیت full hd 1080p از لینک ز