معرفی تجهیزات مورد نیاز عکاسی به زبان فارسی(قسمت دوم)با دانش سارویی
جولای 16, 2019
3467
بدون دیدگاه


You must need to login..!
هر عکاسی برای گرفتن تصاویر بهتر نیاز به تجهیزات پیشرفته و حتی ساده دارد
در این ویدیو قرار است لوازم ساده ای که ممکن است در هر خانه ای پیدا شود و بسیار مفید برای عکاسی هست رو معرفی کرده و کاربرد هر کدام رو توضیح بدم
نرم افزار
رقابت زیادی برای نرم افزارهایی که تصاویر را پردازش می کنند وجود دارد که دو گزینه محبوب Capture One Pro و Adobe Lightroom هستند. این دو برنامه مشابه هستند – هر دو به شما امکان می دهند عکس های خود را سازماندهی و ویرایش کنید – اما لایت روم بسیار ارزان تر است. برخی استدلال می کنند که Capture One Pro بهتر است (در حالی که برخی برعکس) ، اما لایت روم برای افراد با بودجه ایده آل است ، زیرا هزینه آن نیمی از قیمت است. برای چیزی که ارزشش را دارد ، من همیشه از لایت روم استفاده می کنم ، و به نظر می رسد فوق العاده است.
مانیتورها
اگر تازه عکاسی هستید ، احتمالاً مانیتور فعلی شما به اندازه کافی برای کارهای ویرایش جدی مناسب نیست. به طور خاص ، رنگ های روی صفحه نمایش شما به طور حتم اشتباه خواهند بود – شما چیزی را که فکر می کنید هستید ویرایش نمی کنید.
برای اطلاعات بیشتر راهنمای خرید مانیتور خود را بررسی کنید ، اگرچه توجه داشته باشید که چندین مانیتور جدید از زمان انتشار ، وارد بازار شده اند. یکی از بهترین مدل های جدید صفحه نمایش AOC 12367FH 23 اینچ است. با این نام عجیب و غریب فریب نخورید – با قیمت 160 دلار ، این یکی از کم هزینه ترین مانیتورهای IPS در بازار است ، و اگر می خواهید کار جدی در رایانه انجام دهید ، به مانیتور IPS احتیاج دارید. بله ، گزینه های بهتری وجود دارد (اغلب با هزینه قابل توجهی بیشتر) ، اما این مانیتور شروع خوبی برای مبتدی است. در اینجا پیوندی به مانیتور AOC از B&H وجود دارد.
روشنایی
سلب مسئولیت: من برای عکسهایم از نورپردازی خارجی زیادی استفاده نمی کنم ، عمدتاً به این دلیل که از افراد زیادی عکس نمی گیرم. گفته می شود ، بیشتر عکاسان برای عکسهای پرتره یا عکاسی خلاقانه هنوز هم در بعضی مواقع یا به فلش نیاز دارند.
فلاش مارک نیکون صدها دلار هزینه دارد ، با فرض اینکه شما می خواهید فلشی را فعال کنید که بتواند در حالت اتوماتیک (TTL) به صورت غیرفعال عمل کند. با این حال ، گرگرفتگی های شخص ثالث با این ویژگی ها می تواند بسیار ارزان باشد – Yongnuo YN-568EX ، یک فلاش کاملاً مشخص را برای قیمت 105 دلار ببینید. بسته به ژانر عکاسی که بیشتر تمرین می کنید ، این ممکن است تنها فلاش مورد نیاز شما باشد. (یا ممکن است به ده ها مورد دیگر نیاز داشته باشید – از هر عکاس پرتره بپرسید!) در اینجا پیوندی به فلاش Yongnuo در B&H وجود دارد.
فیلترها
فیلترها یکی دیگر از عناصر اساسی جعبه ابزار یک عکاس است. در دوربین های دیجیتالی ، در وهله اول تنها چند فیلتر حتی لازم است (فیلترهای تصحیح رنگ قدیمی برای فیلم می توانند با استفاده از نرم افزارهایی مانند Adobe Lightroom تکثیر شوند) – اما بعضی از فیلترها در پردازش نمی توانند تکرار شوند. تنها فیلتر مفید برای عکاسی دیجیتال ، قطبی است. دقیقاً مانند عینک آفتابی قطبی ، این فیلترها از درخشش سطوح براق (غیر از فلز) براق می شوند ، آسمان را تاریک می کنند و مه را کاهش می دهند. به علاوه ، آنها تصاویر را پر جنب و جوش تر و اشباع تر جلوه می دهند.
اگر عکاس منظره نیستید ، به دلیل این مزایا ، یک قطبش را می خواهید – و اگر یک عکاس چشم انداز باشید ، احتمالاً هرگز قطبنده را از لنزهای خود حذف نمی کنید! بسته به لنز یا لنزهایی که استفاده می کنید ، نیاز به قطبی ساز در اندازه خاص دارید. فیلترهای پولاریزه (و به طور کلی فیلترها) به اندازه میلی متر اندازه می گیرند – دقیقاً مثل حلقه های جلویی روی یک لنز. برای لنزهایی با حلقه 72 میلی متر (مانند Sigma 18-35mm f / 1.8 که در بالا پیشنهاد کردم) ، به فیلتر 72 میلی متری احتیاج دارید.
Software
There is a lot of competition for software that processes images, with the two most popular options being Capture One Pro and Adobe Lightroom. These two programs are similar — they both allow you to organize and edit your photos — but Lightroom is far less expensive. Some argue that Capture One Pro is better (whereas some argue the opposite), but Lightroom will is ideal for those on a budget, since it costs half the price. For what it’s worth, I only ever use Lightroom, and I find it to be wonderful.
To purchase Adobe Lightroom 6 for $145, visit this link to Adorama. Note, though, that some products (including the lenses that I listed earlier on this page) can be bundled with Lightroom and save you an additional $40. If you want, you can also download trial versions, both for Capture One Pro and for Adobe Lightroom.
Monitors
If you are a just starting photography, your current monitor probably is not good enough for serious editing work. Specifically, the colors on your screen will almost certainly be wrong — you will not be editing anything how you think you are.
Check out our monitor purchase guide for more information, although note that several new monitors have come onto the market since it was published. One of the best new models is the AOC 12367FH 23” screen. Don’t be fooled by the bizarre name — at $160, this is one of the least expensive IPS monitors on the market, and you absolutely need and IPS monitor if you want to do serious color work on your computer. Yes, better options exist (often for significantly more money), but this monitor is a great start for a beginner. Here is a link to the AOC monitor from B&H.
Unfortunately, getting a good monitor is only half the battle — step two is color calibration. My strong recommendation is to buy a piece of hardware to calibrate your monitor, such as the $60 Spyder4Express. It does not have all the same features as its $190 older brother, Spyder5Pro, but it gets the job done for a much lower price (assuming you only use one monitor). I edited my photos for almost a year without any calibration, and I never realized how wrong my colors really were. I had to re-edit everything! Save yourself some time and buy a real calibration unit. Here is a link to the Spyder4Express from B&H.
Lighting
Disclaimer: I don’t use much external lighting for my photos, mainly because I do not take many images of people. That said, most photographers will need a flash at some time or another, whether for portraits or for creative still-life photography.
Nikon brand flashes cost hundreds of dollars, assuming that you want a flash that can function off-camera in an automatic (TTL) mode. However, third-party flashes with those features can be fairly cheap — check out the Yongnuo YN-568EX, an extremely well-specified flash for the price of $105. Depending upon the genre of photography you practice most, this may be the only flash you need. (Or you may need dozens more — ask any portrait photographer!) Here is a link to the Yongnuo flash at B&H.
You may also want some light modifiers (such as reflectors), but I don’t recommend getting anything more until you are sure that you want to do portrait photography. There is no end to the world of light modifiers, and a beginner should learn the basics before deciding which complex lighting setups to buy.
Filters
Filters are another essential element of a photographer’s toolbox. With digital cameras, only a few filters are even necessary in the first place (the old color-correction filters for film can be replicated using software like Adobe Lightroom) — but some filters cannot be replicated in post-processing. The single most useful filter for digital photography is a polarizer. Just like polarized sunglasses, these filters cut glare from shiny surfaces (other than metal), they darken skies, and they reduce haze. Plus, they make images look more vibrant and saturated.
If you are not a landscape photographer, you will want a polarizer because of these benefits — and if you are a landscape photographer, you will probably never remove the polarizer from your lens! Depending upon the lens or lenses that you use, you will need to get a polarizer of a specific size. Polarizing filters (and filters in general) are sized in millimeters — just like the front rings on a lens. For a lens with a 72mm ring (like the Sigma 18-35mm f/1.8 that I suggested above), you would need a 72mm filter.
If you are on a budget, buy a polarizer that is the same size as the filter ring of your largest lens. For example, you may choose to go with my suggestion to buy both the Nikon 35mm f/1.8 DX and the Sigma 17-55mm f/2.8 OS. If you do, these lenses have different filter ring sizes — the Nikon is 52mm, whereas the Sigma is 77mm. To use the same filter on both lenses, get a 77mm filter a plus a 52mm-to-77mm step-up ring. This is a lot less expensive than buying two filters!
Filters can be expensive, and with good reason — a bad filter will harm the image quality of every image you take. So, don’t skimp on a filter! One brand known for a good balance of price and quality is Hoya, which is my first recommendation for a beginning photographer.
Here is a link to the Hoya 77mm polarizer at B&H. You would use this size if you choose the Sigma 17-50mm f/2.8 OS lens, which has a 77mm filter ring. This filter costs just under $90.
Here is a link to the Hoya 72mm polarizer at B&H. You would use this size if you choose the Sigma 18-35mm f/1.8 lens, which has a 72mm filter ring. This filter costs $60.
Here is a link to B&H for the 52mm to 77mm step-up ring that you would use on the Nikon 35mm f/1.8 lens, if you also bought the 17-50mm f/2.8 lens (which has a 77mm filter thread). This ring costs less than $4.
If you decide that landscape photography is your favorite type, you will probably need two additional filters: a graduated neutral density filter to darken skies (get a rectangular graduated filter, not a circular one) and a regular neutral density filter to blur moving water. However, both of these are specialist filters, and I recommend waiting until you know what you want before buying either. For now, a high-quality polarizing filter should be more than enough.
Total: $60 if you bought the Sigma 18-35mm f/1.8, a bit over $90 if you bought the Nikon 35mm f/1.8 and Sigma 17-50mm f/2.8 OS.
10 تکنیک مهم عکاسی با موبایل برای افراد مبتدی برای دانلود رایگان 10 تکنیک مهم عکاسی با موبایل برای افراد مبتدی با کیفیت 1080p از پلیر سایت یا لینک ز�
آموزش گریم عرق صورت در فیلم برای دانلود رایگان آموزش گریم عرق صورت در فیلم با کیفیت 1080p از پلیر سایت یا لینک زیر استفاده کنین لینک دانلود link downloa
بدون آرایش در فیلم : تئوری رنگ پالت ها برای دانلود رایگان بدون آرایش در فیلم : تئوری رنگ پالت ها با کیفیت 1080p از پلیر سایت یا لینک زیر استفاده ک�
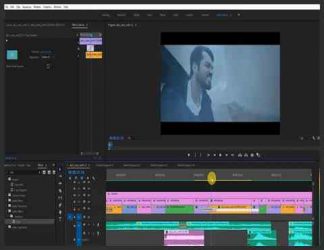
آموزش ویرایش و ادیت ویدیوهای سینمایی در Premiere Pro برای دانلود رایگان آموزش ویرایش و ادیت ویدیوهای سینمایی در Premiere Pro با کیفیت 1080p از پلیر سایت ی�
عکاسی حرفه ای با گوشی xiaomi redmi note 8 pro برای دانلود رایگان عکاسی حرفه ای با گوشی xiaomi redmi note 8 pro با کیفیت 1080p از پلیر سایت یا لینک زیر استفاده کنین لینک
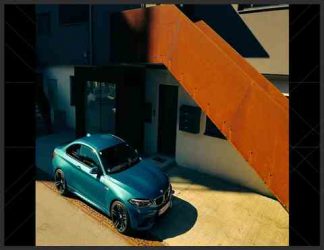
آموزش چگونگی عکاسی از ماشین با گوشی هوشمند برای دانلود رایگان آموزش چگونگی عکاسی از ماشین با گوشی هوشمند با کیفیت 1080p از پلیر سایت یا لینک زیر ا