آموزش عکاسی با نور کم
سپتامبر 19, 2019
3112
بدون دیدگاه


You must need to login..!
هنگام استفاده از دیافراگم های گسترده (به خصوص f / 2.8 یا سریعتر) ، عمق میدان شما به طرز چشمگیری کاهش می یابد ، بنابراین بسیار مهم است که تمرکز شما متمرکز شود ، در غیر این صورت می توانید با ویژگی های چهره ای غیر از تمرکز مواجه شوید. ممکن است بینی فرد تیز باشد اما چشم ها نرم باشد.
با عکس های کاملاً مرکب ، روی چشم ها تمرکز کنید. با ترکیبات گسترده تری ، روی سر تمرکز کنید. برای کمک به تمرکز نقاط دقیق ، یک نقطه فوکوس خودکار (AF) را به صورت دستی انتخاب کنید.
یک تکنیک خوب برای تنظیم نقطه AF مرکزی است ، دکمه شاتر را نیمه فشار دهید تا روی چشم / سر متمرکز شود ، سپس توصیه کنید قبل از فشردن کامل دکمه ، سوژه خود را از یک طرف خاموش کنید – این اغلب راهی سریعتر برای عکسبرداری است. از تداخل با نقاط AF.
از طرف دیگر ، نقاط AF را در گوشه های بالا تنظیم کرده و آنها را بر روی چشمان سوژه خود قرار دهید تا عکس خود را بگیرید. هر کدام از گزینه ها به شما کمک می کنند تا موضوع خود را در خارج از مرکز برای یک ترکیب متعادل تر قرار دهید.
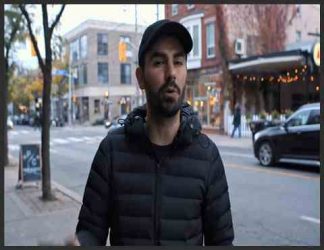
چگونگی ایستادن ، نمایش و نمایش موضوعی شما تأثیر چشمگیری در نتایج شما خواهد گذاشت. تغییر جزئی در چهره – مانند اینکه آنها لبخند می زنند یا خیر – می تواند کل احساس عکس را تغییر دهد.
هنگام عکسبرداری ، طیف وسیعی از عبارات را امتحان کنید و ضبط کنید تا هنگام ویرایش آنها به خانه در رایانه ، گزینه مورد نظر خود را انتخاب کنید.
همچنین در نظر بگیرید که عکس های پرتره را در جایی که سوژه شما خارج از دوربین ، از بالا یا پایین یا از یک طرف به نظر می رسد ، قرار دهید. بازی در اطراف و ببینید که چه چیزی موثر است.
When using wide apertures (especially f/2.8 or faster), your depth of field decreases dramatically, so it’s crucial your focusing is bang on, otherwise you could end up with out-of-focus facial features; the person’s nose may be sharp but the eyes soft.
With tightly composed photos, focus on the eyes; with wider compositions, focus on the head. To help with pinpoint focusing, manually select a single autofocus (AF) point.
A good technique is to set the central AF point, half-press the shutter button to focus on the eyes/head, then recompose to position your subject off to one side before fully pressing the button – this is often a much faster way of shooting than fiddling with AF points.
Alternatively, set AF points in the top corners and place them over your subject’s eyes to take your shot. Either option will help you position your subject off-centre for a more balanced composition.
How your subject stands, poses and looks will have a dramatic effect on your results. A slight change in facial expression – such as whether they smile or not – can radically change the entire feeling of the photograph.
When shooting, try and capture a range of expressions so you can pick which you prefer when editing them back home on the computer.
Also consider setting up portrait shots where your subject looks off-camera, up or down, or to one side. Play around and see what works.
10 تکنیک مهم عکاسی با موبایل برای افراد مبتدی برای دانلود رایگان 10 تکنیک مهم عکاسی با موبایل برای افراد مبتدی با کیفیت 1080p از پلیر سایت یا لینک ز�
عکاسی حرفه ای با گوشی xiaomi redmi note 8 pro برای دانلود رایگان عکاسی حرفه ای با گوشی xiaomi redmi note 8 pro با کیفیت 1080p از پلیر سایت یا لینک زیر استفاده کنین لینک
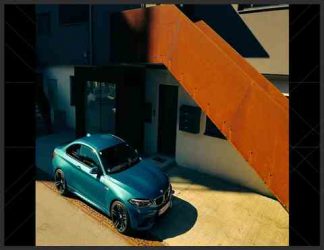
آموزش چگونگی عکاسی از ماشین با گوشی هوشمند برای دانلود رایگان آموزش چگونگی عکاسی از ماشین با گوشی هوشمند با کیفیت 1080p از پلیر سایت یا لینک زیر ا
معرفی پلی استیشن 5 به همراه ویدیو و عکس (playstation5) پلی استیشن 5 کنسول بازی نسل نهمی سونی است که دارای ویژگیهایی چون پشتیبانی از SSD است. تاکنون بازی�
آموزش ایجاد افکت نوارهای VHS رو ویدیو در Premiere برای دانلود آموزش ایجاد افکت نوارهای VHS رو ویدیو در Premiere با کیفیت full hd 1080p از پلیر سایت یا لینک زیر
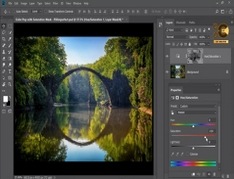
طریقه کار کردن با Mask و Saturation در photoshop(فتوشاپ) برای دانلود آموزش طریقه کار کردن با Mask و Saturation در photoshop(فتوشاپ) با کیفیت full hd 1080p از لینک زیر یا پلیر س