بهترین تنظیمات دوربین Canon EOS 60D برای فیلمبرداری
سپتامبر 6, 2019
6377
بدون دیدگاه


You must need to login..!
شماره گیری حالت را بر روی Av (تنظیم اولویت دیافراگم) قرار دهید و سپس کمترین مقدار ممکن f-stop را انتخاب کنید.
عدد F کم ایستگاه دیافراگم را باز می کند ، که عمق میدان یا دامنه فوکوس شدید را کوتاه می کند. بنابراین ، شماره گیری با مقدار کم F-stop اولین قدم برای نرم کردن پس زمینه پرتره شما است. (و ، بله ، محدوده f-stop در دسترس شما بستگی به لنز شما دارد.) به خاطر داشته باشید که هرچه سوژه شما از پس زمینه دورتر باشد ، هرچه میزان دیافراگم بیشتر باشد می توانید در هر مرحله f محصور شوید.
اگر یک حالت را در Creative Zone انتخاب کنید ، می توانید دیافراگم فعلی و سرعت شاتر را در صفحه نمایش تنظیمات عکسبرداری ، در صفحه نمایش منظره (وسط) و در صفحه نمایش LCD (سمت راست) مشاهده کنید.
برای نرم کردن بیشتر پس زمینه ، بزرگنمایی یا نزدیک شدن (یا هر دو) را بزرگنمایی کنید.
بزرگنمایی در یک فاصله کانونی طولانی تر نیز عمق میدان را کاهش می دهد ، همانطور که حرکت فیزیکی به موضوع شما نزدیکتر است.
از استفاده از لنزهایی با فاصله کانونی کوتاه (لنز با زاویه دید گسترده) برای عکسهای پرتره خودداری کنید. فاصله کانونی کوتاه باعث می شود ویژگی ها منحرف به نظر برسند ، مانند روشی که مردم هنگام مشاهده آنها از طریق یک گاو امنیتی در یک درب مشاهده می کنند.
برای پرتره های داخلی ، در صورت امکان از حالت فلاش شلیک کنید.
تیراندازی با نور موجود و نه از طریق فلاش باعث ایجاد نور نرم تر می شود و از مشکل قرمزی جلوگیری می کند. برای دریافت نور کافی برای فلاش ، چراغ های اتاق را روشن کنید یا در طول روز موضوع خود را در کنار یک پنجره روشن قرار دهید.
برای عکسهای پرتره در فضای باز از یک فلاش استفاده کنید.
حتی در نور روز روشن ، یک فلاش لکه بینی سودمندی را به چهره فرد می بخشد.
متأسفانه ، اگر نور بسیار روشن است ، دوربین به شما اجازه نمی دهد از فلاش در حالت پرتره استفاده کنید. در حالت Av، فقط دکمه Flash را در کنار دوربین فشار دهید تا فلاش فعال شود. با تنظیم جبران قرار گرفتن در معرض فلش ، قدرت فلاش را در حالت کنترل سریع تنظیم کنید. در حالت Creative Auto ، فلش را بر روی تنظیم Flash (پر کردن فلش) تنظیم کنید.
در روشنایی کم ، ممکن است دوربین هنگام فعال کردن فلاش داخلی در حالت Av ، سرعت شاتر آهسته را انتخاب کنید ، بنابراین به این مقدار توجه داشته باشید و در صورت لزوم از یک سه پایه استفاده کنید تا از تار شدن در لرزش دوربین جلوگیری شود.
دکمه شاتر را تا نیمه فشار دهید و نگه دارید تا نورسنجی را درگیر کنید و در حالت فوکوس خودکار ، برای قفل کردن فوکوس.
مطمئن شوید که یک نقطه فوکوس خودکار فعال روی سوژه شما قرار می گیرد. (در منظره یاب ، نقاط فوکوس خودکار فعال قرمز می شوند.) برای بهترین نتیجه ، سعی کنید روی چشم سوژه خود تمرکز کنید. انتخاب دستی یک نقطه تمرکز می تواند به عکسبرداری در پرتره نیز کمک کند.
از طرف دیگر ، می توانید با فشار دادن دکمه AE Lock و فعال کردن فوکوس خودکار با فشار دادن AF-ON ، خواندن یک متر را قفل کنید.
Set the Mode dial to Av (aperture priority autoexposure) and then select the lowest possible f-stop value.
A low f-stop number opens the aperture, which shortens depth of field, or the range of sharp focus. So, dialing in a low f-stop value is the first step in softening your portrait background. (And, yes, the f-stop range available to you depends on your lens.) Keep in mind that the farther your subject is from the background, the more background blurring you can achieve at any one f-stop.
If you choose a mode in the Creative Zone, you can monitor the current aperture and shutter speed in the Shooting Settings display, in the viewfinder display (middle), and on the top LCD display (right).
To further soften the background, zoom in or get closer (or both).
Zooming in to a longer focal length also reduces depth of field, as does moving physically closer to your subject.
Avoid using a lens with a short focal length (a wide angle lens) for portraits. A short focal length can cause features to appear distorted, similar to the way people look when you view them through a security peephole in a door.
For indoor portraits, shoot flash-free, if possible.
Shooting by available light rather than by flash produces softer illumination and avoids the problem of red-eye. To get enough light to go flash-free, turn on room lights or, during daylight, pose your subject next to a bright window.
For outdoor portraits, use a flash.
Even in bright daylight, a flash adds a beneficial splash of light to a subject’s face.
Unfortunately, the camera doesn’t let you use flash in Portrait mode if the light is very bright. In the Av exposure mode, just press the Flash button on the side of the camera to enable the flash; adjust flash strength in Quick Control mode by adjusting the Flash exposure compensation. In Creative Auto mode, set the flash to the Flash On (fill flash) setting.
In dim lighting, the camera may select a slow shutter speed when you enable the built-in flash in Av mode, so keep an eye on that value and use a tripod if necessary to avoid blurring from camera shake.
Press and hold the shutter button halfway to engage exposure metering and, in Autofocus mode, to lock in focus.
Make sure that an active autofocus point falls over your subject. (In the viewfinder, active autofocus points turn red.) For the best results, try to set focus on your subject’s eyes; manually selecting a focus point can help in portrait shooting, too.
Alternatively, you can lock in a meter reading by pressing the AE Lock button and activating the autofocus by pressing AF-ON.
معرفی پلی استیشن 5 به همراه ویدیو و عکس (playstation5) پلی استیشن 5 کنسول بازی نسل نهمی سونی است که دارای ویژگیهایی چون پشتیبانی از SSD است. تاکنون بازی�
آموزش ایجاد افکت نوارهای VHS رو ویدیو در Premiere برای دانلود آموزش ایجاد افکت نوارهای VHS رو ویدیو در Premiere با کیفیت full hd 1080p از پلیر سایت یا لینک زیر
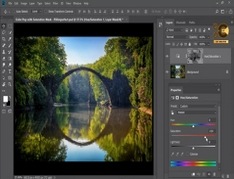
طریقه کار کردن با Mask و Saturation در photoshop(فتوشاپ) برای دانلود آموزش طریقه کار کردن با Mask و Saturation در photoshop(فتوشاپ) با کیفیت full hd 1080p از لینک زیر یا پلیر س
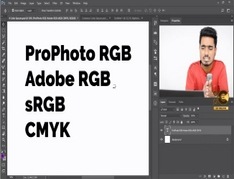
توضیحاتی درباره سیستم رنگی RGB , sRGB , CMYK و… برای دانلود آموزش توضیحاتی درباره سیستم رنگی RGB , sRGB , CMYK و… با کیفیت full hd 1080p از لینک زیر یا پلیر سایت اس�
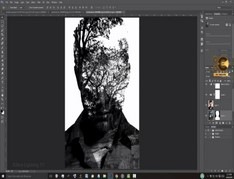
آموزش خلق پوستر حرفه ای از پرتره در photoshop برای دانلود رایگان آموزش خلق پوستر حرفه ای از پرتره در photoshop با کیفیت full hd 1080p از پلیر سایت یا لینک زیر ا�
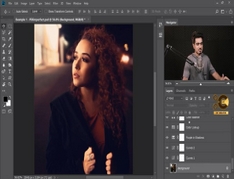
از تنظیمات پیشرفته فتوشاپ در Lightroom استفاده کنید برای دانلود آموزش از تنظیمات پیشرفته فتوشاپ در Lightroom استفاده کنید! با کیفیت full hd 1080p از لینک زیر �