بهترین تنظیمات دوربین Nikon D5200-D5300-D5500 برای فیلمبرداری نسخه دوم
سپتامبر 4, 2019
5785
بدون دیدگاه


You must need to login..!
دکمه اطلاعات را فشار دهید. یک بار فشار دهید تا صفحه نمایش داده شود. مجدداً فشار دهید تا مانیتور خاموش شود.
دکمه شاتر را تا نیمه فشار دهید و آن را رها کنید. فشار دادن و نگه داشتن دکمه در نیمه کار صفحه نمایش را خاموش می کند و سیستم های اندازه گیری فوکوس خودکار و قرار گرفتن در معرض آتش را خاموش می کند. از آنجا که این دو سیستم از توان باتری استفاده می کنند ، ممکن است بخواهید از کمبود این باتری جلوگیری کنید.
دکمه ویرایش اطلاعات را فشار دهید. البته توجه داشته باشید که بار دوم فشار دادن دکمه نمایشگر را خاموش نمی کند – درعوض ، به نوار کنترلی در انتهای صفحه نمایش دسترسی پیدا می کند ، که می توانید از آن برای تنظیم برخی تنظیمات تصویر استفاده کنید. برای مخفی کردن صفحه نمایش اطلاعات بدون فعال کردن نوار کنترل ، دکمه اطلاعات را فشار دهید.
نمایاب: همچنین می توانید برخی از تنظیمات دوربین را در نمایش داده ها در انتهای منظره یاب مشاهده کنید ، همانطور که در سمت چپ در این شکل نشان داده شده است. اطلاعاتی که ظاهر می شود بستگی به عملی دارد که شما در حال حاضر انجام می دهید.
شما می توانید با مراجعه به بخش عکسبرداری / صفحه نمایش از منوی Custom Setting و تبدیل گزینه Viewfinder Grid Display در نمایاب ، همانطور که در سمت راست در شکل مشاهده شده است ، در منظره یاب نمایش دهید. خطوط شبکه هنگامی که شما نیاز به اطمینان از تراز بودن اشیاء در عکس خود دارید – به عنوان مثال ، برای اطمینان از سطح افق در یک منظره ، کمک بزرگی خواهد کرد.
اگر آنچه در این ارقام مشاهده می کنید مانند یک آشفتگی گیج کننده است ، نگران نباشید. بسیاری از تنظیمات مربوط به گزینه هایی است که تا زمانی که حالت های نوردهی پیشرفته را کشف نکنید ، برای شما معنی ندارند. اما توجه داشته باشید که به داده های زیر که حتی در حالت های اتوماتیک شلیک می کنید نیز کمک می کند:
نشانگر وضعیت باتری: یک نماد باتری کامل نشان می دهد که باتری کاملاً شارژ است. اگر نماد خالی به نظر می رسد ، به دنبال شارژر باتری خود باشید.
وقتی همه چیز به نقطه خطرناکی می رسد منظره یاب شما نماد کوچک باتری کم را نشان می دهد. این نماد درست در سمت راست مرکز در نوار تنظیمات در انتهای منظره یاب مشاهده می شود. اگر نماد چشمک زن باشد ، باتری کاملاً کاپوت است و رها شدن دیافراگم غیرفعال است.
فقط برای اندازه گیری مناسب ، دوربین نماد باتری کم را نیز در قسمت تصویر منظره یاب نشان می دهد.
عکس های باقیمانده: این مقدار نشان می دهد که چند عکس دیگر می توانید در کارت حافظه ذخیره کنید. اگر عدد از 999 فراتر رود ، مقدار کمی متفاوت ارائه می شود. K اولیه در بالای مقدار نشان داده می شود که مقدار اول نشان دهنده تعداد عکس در هزاران است.
به عنوان مثال ، 1.0K به معنای آن است که شما می توانید 1000 عکس دیگر را ذخیره کنید (K بودن یک نماد پذیرفته شده جهانی است که نشان دهنده 1000 واحد است). سپس شماره به نزدیکترین صد جمع می شود. بنابراین اگر کارت فضای لازم را داشته باشد ، مثلاً 1230 عکس دیگر ، مقدار آن 1.2K خوانده شده است.
Press the Info button. Press once to display the screen; press again to turn off the monitor.
Press the shutter button halfway and release it. Pressing and holding the button halfway down turns off the screen and fires up the autofocusing and exposure metering systems. Because those two systems use battery power, you may want to avoid this technique when the battery is running low.
Press the Information Edit button. Note, though, that pressing the button a second time doesn’t turn off the display — instead, it accesses a control strip at the bottom of the display, which you can then use to adjust certain picture settings. To hide the Information display without activating the control strip, press the Info button.
Viewfinder: You also can view some camera settings in the data display at the bottom of the viewfinder, as shown on the left in this figure. The information that appears depends on what action you’re currently undertaking.
You can display gridlines in the viewfinder, as shown on the right in the figure, by visiting the Shooting/Display section of the Custom Setting menu and turning the Viewfinder Grid Display option to On. The gridlines are a great help when you need to ensure the alignment of objects in your photo — for example, to make sure that the horizon is level in a landscape.
If what you see in these figures looks like a confusing mess, don’t worry. Many of the settings relate to options that won’t mean anything to you until you explore the advanced exposure modes. But do make note of the following bits of data that are helpful even when you shoot in the fully automatic modes:
Battery status indicator: A full-battery icon shows that the battery is fully charged; if the icon appears empty, look for your battery charger.
Your viewfinder displays a tiny low-battery icon when things get to the dangerous point. The icon appears just to the right of center in the settings strip at the bottom of the viewfinder. If the icon blinks, the battery is totally kaput, and shutter release is disabled.
Just for good measure, the camera also displays a low-battery symbol in the image area of the viewfinder.
Shots remaining: This value indicates how many additional pictures you can store on the memory card. If the number exceeds 999, the value is presented a little differently. The initial K appears above the value to indicate that the first value represents the picture count in thousands.
For example, 1.0K means that you can store 1,000 more pictures (K being a universally accepted symbol indicating 1,000 units). The number is then rounded down to the nearest hundred. So if the card has room for, say, 1,230 more pictures, the value reads 1.2K.
معرفی پلی استیشن 5 به همراه ویدیو و عکس (playstation5) پلی استیشن 5 کنسول بازی نسل نهمی سونی است که دارای ویژگیهایی چون پشتیبانی از SSD است. تاکنون بازی�
آموزش ایجاد افکت نوارهای VHS رو ویدیو در Premiere برای دانلود آموزش ایجاد افکت نوارهای VHS رو ویدیو در Premiere با کیفیت full hd 1080p از پلیر سایت یا لینک زیر
طریقه کار کردن با Mask و Saturation در photoshop(فتوشاپ) برای دانلود آموزش طریقه کار کردن با Mask و Saturation در photoshop(فتوشاپ) با کیفیت full hd 1080p از لینک زیر یا پلیر س
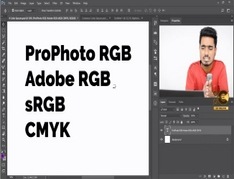
توضیحاتی درباره سیستم رنگی RGB , sRGB , CMYK و… برای دانلود آموزش توضیحاتی درباره سیستم رنگی RGB , sRGB , CMYK و… با کیفیت full hd 1080p از لینک زیر یا پلیر سایت اس�
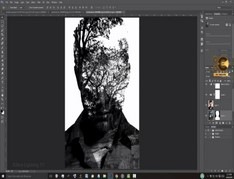
آموزش خلق پوستر حرفه ای از پرتره در photoshop برای دانلود رایگان آموزش خلق پوستر حرفه ای از پرتره در photoshop با کیفیت full hd 1080p از پلیر سایت یا لینک زیر ا�
از تنظیمات پیشرفته فتوشاپ در Lightroom استفاده کنید برای دانلود آموزش از تنظیمات پیشرفته فتوشاپ در Lightroom استفاده کنید! با کیفیت full hd 1080p از لینک زیر �