آموزش اصلاح رنگ با sony vegas
سپتامبر 15, 2019
3681
بدون دیدگاه


You must need to login..!
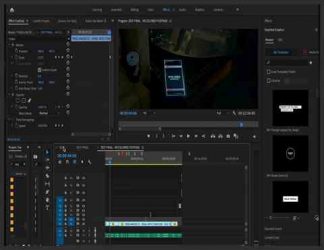
ویژگی سونی وگاس
پنل Color Grading تمام مهمترین ابزارهای شما را در یک مکان مناسب قرار می دهد. این یک گزینه بسیار کارآمد برای اضافه کردن جلوه های فردی متعددی است که در غیر این صورت به صورت جداگانه در یک زنجیره اثر دسترسی خواهید داشت. اکنون ، با یک کلیک به همه مهمترین ابزارهای درجه بندی رنگ خود دسترسی پیدا کنید.
از همه مهمتر ، اکنون می توانید با سهولت بیشتری از ابزارها در ارتباط با یکدیگر استفاده کنید زیرا همه آنها به یکباره در دسترس هستند.
پانل Color Grading انتخاب گسترده ای از ابزارها را در اختیار شما قرار می دهد ، بنابراین می توانید با توجه به تنظیمات دلخواه خود با استفاده از این ابزارها کار کنید. ترجیح می دهید از طریق چرخ های رنگی بصری بیشتری کار کنید؟ گرفتمشون. به جای لغزنده ها؟ اونها رو هم گرفت و منحنی های رنگی به شما امکان کنترل دقیق همه مناطق روشنایی را می دهد.
برای شروع درجه بندی رنگ ، همه کارهایی که انجام می دهید را در ذهن داشته باشید ، بنابراین ترتیب انجام آن مهم است.
در بخش دوم پانل ، دقیق ترین روش برای تنظیم و اصلاح نوردهی را پیدا خواهید کرد – منحنی های رنگ. منحنی های رنگی که بر روی نمودار نشان داده شده است ، به شما امکان می دهد میزان قرار گرفتن در معرض یک سطح دقیق فراتر از لغزنده ها را کنترل کنید. این منحنی ها به جای کنترل فقط مناطق عمومی نوردهی – نقاط برجسته ، وسط و سایه ها ، شما را قادر می سازد تا دقیقاً همان چیزی را که می خواهید ، حتی در آن مناطق ، با دقت باورنکردنی شماره گیری کنید. برای کنترل و تنظیم دقیق تر ، از دسته های کنترل منحنی استفاده کنید و نقاط کنترل را در امتداد منحنی اضافه کنید.
پایین سمت چپ منحنی را صاف کنید تا سایه ها تیره شود و بالا سمت راست را صاف کنید تا هایلایت ها روشن شود. برای کنترل کنتراست ویدیوی خود می توانید این تنظیمات را همزمان انجام دهید. برای روشن یا تیره شدن قسمت اصلی تصویر ، قسمت میانی منحنی را بالا یا پایین ببرید.
صفحه با چرخهای رنگی که در قسمت اول دیده می شود ، باز می شود. در زیر هر چرخ یک نوار لغزنده “Y” پیدا خواهید کرد. این نوار لغزنده میزان درخشندگی را تنظیم می کند.
هر چرخ منطقه یا منطقه ای از تاریکی را کنترل می کند. آسانسور بر همه مناطق تأثیر می گذارد. گاما بر ناحیه میانی یا اصلی تصویر شما تأثیر می گذارد. به دست آوردن روشن ترین موارد برجسته تأثیر می گذارد اما وسط و تاریکی را تنها می گذارد. سرانجام ، Offset فقط در تاریک ترین مناطق یا سایه ها تأثیر می گذارد.
نوار لغزنده Y را برای Lift حرکت دهید تا ناحیه نوردهی کامل تنظیم شود. همانطور که آن را به چپ یا راست می کشید ، کل تصویر تیره یا روشن می شود ، شبیه تنظیم عنبیه روی لنز دوربین.
از Gain برای پایین آوردن یا پایین آمدن موارد برجسته استفاده کنید. از Offset برای بالا بردن جزئیات در سایه ها استفاده کنید یا بعضی از آنها را برای سیاه و سفید کردن قلم دهید. گاما نوردهی را در این بین روشن یا تیره می کند ، اما سایه ها و برجسته ها را تنها می گذارد.
sony vegas feature
The Color Grading panel puts all of your most important tools in one convenient place. It provides a highly efficient alternative to adding numerous individual effects that you’d otherwise have access separately in an effects chain. Now, access all of your most important color grading tools with a single click.
More importantly, you can now more easily use the tools in relation with each other because they’re all available at once.
The Color Grading panel gives you a wide choice of tools, so you can work using the tools according to your own preferences. Prefer to work more visually, through color wheels? Got ‘em. Like sliders instead? Got those, too. And the color curves give you precision control over all areas of brightness.
To get started color grading, keep in mind everything you do affects everything else, so the order in which you do it matters.
In the second section of the panel, you’ll find the most precise way to adjust and correct exposure – the color curves. Represented on a graph, the color curves let you control exposure to a level of precision beyond the sliders. Instead of controlling only general areas of exposure – highlights, middle, and shadows – the curves enable you to dial in exactly what you want, even within those areas, with incredible accuracy. Use the curve control handles and add control points along the curve as needed for even finer control and adjustment.
Flatten down the bottom left of the curve to darken the shadows, and flatten up the top right to brighten the highlights. You can make these adjustments simultaneously to control the contrast of your video. Raise or lower the curve’s middle section to brighten or darken the main area of the image.
The panel opens with the color wheels visible on the first section. You’ll find a “Y” slider under each wheel. This slider adjusts luminance.
Each wheel controls an area or zone of darkness. Lift affects all areas. Gamma affects the middle or main area of your image. Gain affects the brightest highlights but leaves the middle and darks alone. Finally, Offset affects only the darkest areas or shadows.
Move the Y slider for Lift to adjust the full exposure area. As you slide it left or right, the entire image becomes darker or lighter, similar to adjusting the iris on a camera lens.
Use Gain to bring the highlights down or up. Use Offset to raise detail in the shadows or clip some of them to pitch black. Gamma brightens or darkens the exposure in between, but leaves the highlights and shadows alone.
ادیت و تدوین ویدیو برای ساخت یک فیلم کوتاه تخیلی و دلهره آور برای دانلود رایگان ادیت و تدوین ویدیو برای ساخت یک فیلم کوتاه تخیلی و دلهره آور با ک
آموزش ادیت و تدوین فیلم کوتاه برای دانلود رایگان آموزش ادیت و تدوین فیلم کوتاه با کیفیت 1080p از پلیر سایت یا لینک زیر استفاده کنین لینک دانلود link
آموزش ادیت فیلم کوتاه برای دانلود رایگان آموزش ادیت فیلم کوتاه با کیفیت 1080p از پلیر سایت یا لینک زیر استفاده کنین لینک دانلود link download مدت پخش
نکاتی در مورد ادیت و کات ویدیو در فیلمسازی برای دانلود رایگان نکاتی در مورد ادیت و کات ویدیو در فیلمسازی با کیفیت 1080p از پلیر سایت یا لینک زیر اس
آموزش ایجاد افکت نوارهای VHS رو ویدیو در Premiere برای دانلود آموزش ایجاد افکت نوارهای VHS رو ویدیو در Premiere با کیفیت full hd 1080p از پلیر سایت یا لینک زیر
طریقه کار کردن با Mask و Saturation در photoshop(فتوشاپ) برای دانلود آموزش طریقه کار کردن با Mask و Saturation در photoshop(فتوشاپ) با کیفیت full hd 1080p از لینک زیر یا پلیر س