ساخت آسان color grade بدون نیاز به پلاگین در After Effects
سپتامبر 29, 2019
3632
بدون دیدگاه


You must need to login..!
فیلم سازی: استفاده از رنگ در فیلم شما
رنگ بخش مهمی از بسته ابزار فیلمساز است. می توانید از آن برای خلق و خو و احساسات استفاده کنید ، هنگام تنظیم صحنه به مخاطب بگویید یا درباره شخصیت ها و تنظیمات اطلاعاتی ارائه دهید.
شما می توانید از رنگ با استفاده از:
دارای ویژگی های خاص در لباس ، لباس یا تنظیمات
انتخاب نور با تعادل رنگی که می خواهید
افزودن ژل برای تغییر رنگ نور
تصحیح و درجه بندی رنگ در مرحله ویرایش
تعادل رنگ
می توانید فیلم را با نوری انتخاب کنید که تعادل رنگ خاصی داشته باشد. برخی از فیلمسازان انتخاب می کنند که در ساعت طلایی بعد از طلوع فجر یا قبل از غروب آفتاب ، یا ساعت آبی سحر یا غروب فیلمبرداری کنند.
برای انتخاب سریع و کثیف رنگ ها ، می توانید عمداً دوربین خود را روی تعادل رنگ سفید اشتباه تنظیم کنید. برای داشتن رنگ آبی ، هنگام فیلمبرداری در فضای باز ، تراز سفیدی دوربین خود را روی “تنگستن” تنظیم کنید. برای یک لحن گرم ، زیر نور تنگستن فیلم بگیرید و تعادل آن در نور روز تنظیم شود.
اما بهتر است با تعادل رنگ طبیعی / خنثی عکس بگیرید و پس از آن رنگ را تنظیم کنید.
برای به دست آوردن تعادل رنگ درست هنگام فیلمبرداری ، از یک متر سنج استفاده کنید یا تراز سفیدی را به صورت دستی تنظیم کنید. با اکثر دوربین ها می توانید این کار را با استفاده از کارت سفید انجام دهید.
با استفاده از برنامه دوربین در iPhone / iPad ، قرار گرفتن در معرض قفل تعادل رنگ سفید را نیز تنظیم می کند. یک کارت خاکستری بلافاصله مقابل سوژه اصلی خود قرار دهید و صفحه را لمس کنید تا قفل AE / AF ظاهر شود.
تصحیح و درجه بندی
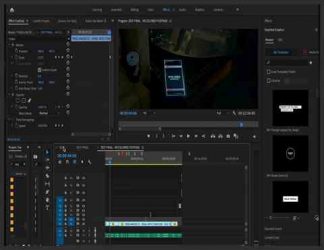
می توانید رنگ را در مرحله ویرایش تنظیم و اصلاح کنید. بسته های حرفه ای مانند Final Cut Pro X و Adobe Premiere Pro کنترل بیشتری به شما می دهند.
با درست قرار گرفتن در معرض و کنتراست شروع کنید ، سپس قبل از تنظیم رنگ یا رنگ ، اشباع را تنظیم کنید. برای اصلاح دقیق ، به جای تکیه بر چشم ، برای تنظیم رنگ پوست از بردارها استفاده کنید.
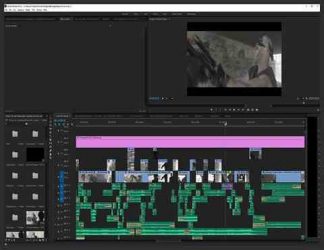
هنگامی که رنگ را اصلاح کردید ، می توانید کلیپ ها را “درجه بندی” کنید: انجام تنظیمات به گونه ای که کلیپ های ضبط شده در زمان های مختلف با یکدیگر مطابقت داشته باشند ، یا استفاده از “ظاهر” کلی برای تغییر حالت.
Filmmaking: Using Colour in Your Movie
Colour is an important part of the filmmaker’s toolkit. You can use it for mood and emotion, to tell the audience when the scene is set, or to provide information about characters and settings.
You can use colour by:
featuring specific colours in your props, costumes or settings
choosing lighting with the colour balance you want
adding gels to change the colour of the lighting
correcting and ‘grading’ the colour at the editing stage
Colour balance
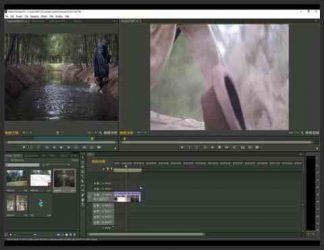
You could choose to film with lighting that has a particular colour balance. Some filmmakers choose to shoot in the golden hour after dawn or before sunset, or the blue hour at dawn or dusk.
For quick and dirty colour casts, you can deliberately set your camera to the wrong white balance. For a blue hue, set your camera’s white balance to ‘tungsten’ when you’re filming outdoors; for a warm tone, film under tungsten light with the balance set to daylight.
But it’s better to shoot with a natural/neutral colour balance and adjust the colour afterwards.
To get the colour balance right when you’re filming, use a colour meter or set the white balance manually. With most cameras, you can do this by using a white card.
With the Camera app on iPhone/iPad, locking exposure also sets white balance. Position a grey card immediately in front of your main subject and touch on the screen until AE/AF lock appears.
Correction and grading
You can adjust and correct colour at the editing stage. Pro packages like Final Cut Pro X and Adobe Premiere Pro give you more control.
Start by getting the exposure and contrast right, then adjust the saturation, before adjusting the hue or tint. For precise corrections use the vectorscopes, rather than relying on your eye, to adjust skin tones.
Once you’ve corrected the colour, you can ‘grade’ the clips: making adjustments so that clips shot at different times match each other, or applying an overall ‘look’ to change the mood.
ادیت و تدوین ویدیو برای ساخت یک فیلم کوتاه تخیلی و دلهره آور برای دانلود رایگان ادیت و تدوین ویدیو برای ساخت یک فیلم کوتاه تخیلی و دلهره آور با ک
آموزش ادیت و تدوین فیلم کوتاه برای دانلود رایگان آموزش ادیت و تدوین فیلم کوتاه با کیفیت 1080p از پلیر سایت یا لینک زیر استفاده کنین لینک دانلود link
آموزش ادیت فیلم کوتاه برای دانلود رایگان آموزش ادیت فیلم کوتاه با کیفیت 1080p از پلیر سایت یا لینک زیر استفاده کنین لینک دانلود link download مدت پخش
نکاتی در مورد ادیت و کات ویدیو در فیلمسازی برای دانلود رایگان نکاتی در مورد ادیت و کات ویدیو در فیلمسازی با کیفیت 1080p از پلیر سایت یا لینک زیر اس
آموزش ایجاد افکت نوارهای VHS رو ویدیو در Premiere برای دانلود آموزش ایجاد افکت نوارهای VHS رو ویدیو در Premiere با کیفیت full hd 1080p از پلیر سایت یا لینک زیر
طریقه کار کردن با Mask و Saturation در photoshop(فتوشاپ) برای دانلود آموزش طریقه کار کردن با Mask و Saturation در photoshop(فتوشاپ) با کیفیت full hd 1080p از لینک زیر یا پلیر س